 Elite Steel
Stainless steel looks forgiving, but it often resists careless forming. Its strength, surface finish, and corrosion resistance come with a difficult trade-off. Work hardening begins quickly, especially in austenitic grades such as 304 and 316. A small bend can become harder after each pass, increasing cracking risk.
The International Stainless Steel Forum’s Stainless Steel in Figures 2024 shows stainless steel remains essential across construction, transport, food processing, and manufacturing. That widespread use makes reliable forming more than a workshop preference. It affects product safety, appearance, maintenance, and production cost. The World Steel Association also identifies stainless steel as a high-value material requiring controlled processing and quality management.
So, How to bend stainless steel without cracking requires more than force. It demands the correct grade, bend radius, tooling, grain direction, and forming sequence. A polished sheet may hide damage until light exposes a fine line along the outside radius. That is where many failures begin.
There is no universal formula.
Experienced fabricators often test a small sample first. They check the material certificate, measure thickness, and inspect the cut edge for notches or heat damage. Even then, results can vary between batches. This guide presents seven practical tips based on established fabrication principles and manufacturer guidance, including recommendations commonly reflected in ASM International’s forming references and stainless-steel technical datasheets. Some methods work beautifully in one workshop and poorly in another. That limitation matters. Careful observation should remain part of the process.
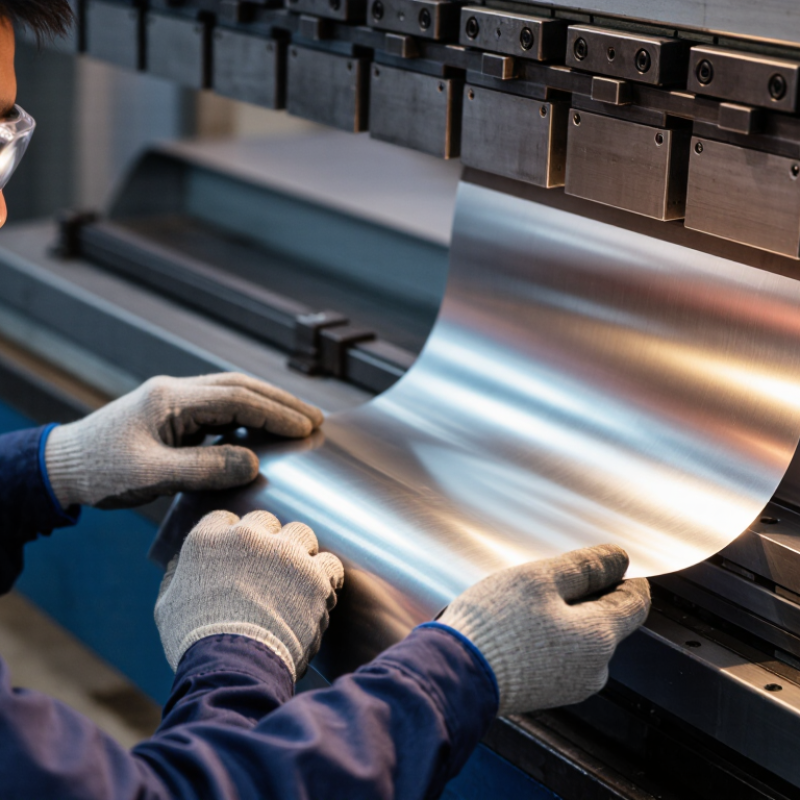
Cracking often starts before the press brake moves. Identify the stainless steel grade, thickness, and temper first. A material certificate or heat number is more reliable than a visual guess. Grade 304 and 316 are generally ductile when annealed, while ferritic or martensitic grades may need different tooling and bend radii. Do not treat every stainless sheet alike.
Measure thickness with a micrometer at several points. Mill scale, coatings, and small variations can change the bend allowance. Then confirm the temper. Annealed sheet usually forms more easily than cold-worked or half-hard sheet. Temper may appear on the certificate, but hardness testing can help when records are unclear. Ask for the actual specification, not a sales description. Small details matter.
Mark the rolling direction and make a trial bend from the same material lot. Bend across the grain when the design permits. Bending parallel to the grain can increase cracking risk. Set the inside radius according to the grade, thickness, and temper. Inspect the outer surface under bright light. Fine white lines are warnings.
I once trusted a nominal thickness and skipped a trial piece. The part looked acceptable until forming opened a shallow crack. The lesson is imperfect but useful: verify the material you have, not the material you expected. Clean tooling also matters, because embedded particles can confuse inspection results.
| Tip | Key Variable | Typical Data and Practical Limits | Recommended Bending Practice | Why It Helps Prevent Cracking |
|---|---|---|---|---|
| 1 | Identify the Stainless Steel Grade |
304 and 316: Austenitic grades with good ductility and work-hardening behavior. 430: Ferritic grade with lower forming ductility than 304. 410: Martensitic grade that is generally less forgiving, especially after hardening. |
Confirm the grade from the material certificate, marking, or a suitable alloy analyzer before selecting tooling and bend allowance. Treat unknown material as higher risk until verified. | Different stainless families have different elongation, work-hardening rates, and fracture sensitivity. A bend procedure suitable for 304 may not be suitable for hardened 410 or less-ductile 430. |
| 2 | Measure Thickness and Select a Suitable Inside Radius | For many annealed 304 and 316 sheet-metal applications, an inside radius near 1.0t is a common starting point, where t is material thickness. More demanding conditions may require approximately 1.5t to 2.0t or more. | Measure the actual sheet thickness rather than relying only on the nominal size. Increase the inside radius for thicker stock, narrow flanges, transverse bends, high-strength tempers, or visible surface requirements. | A larger radius reduces tensile strain on the outside surface of the bend, lowering the chance of splitting, orange-peel texture, and edge cracking. |
| 3 | Check the Temper and Condition |
Annealed material: Usually offers the greatest forming ductility. Cold-worked or quarter, half, and full-hard material: Has higher strength but reduced elongation and greater springback. Heat-treated martensitic grades can be significantly less formable. |
Use annealed or soft-condition stock for severe bends whenever the design allows. If cold-worked material must be used, increase the bend radius and validate the process with a trial coupon. | Cold work raises hardness and yield strength while reducing available ductility. The material can reach its fracture strain sooner during bending. |
| 4 | Account for Rolling Direction and Edge Quality | The risk of cracking can vary with rolling direction, especially in cold-reduced sheet. Laser-cut, sheared, or poorly deburred edges may contain notches or heat-affected regions that initiate cracks. | When practical, orient the bend line across the rolling direction for difficult forming operations. Remove burrs, round sharp edges, and keep the cut edge condition consistent before bending. | Surface notches concentrate stress. Bend orientation and edge condition can influence how readily cracks propagate along the outer tensile zone. |
| 5 | Use Clean, Properly Sized Tooling | A common air-bending starting point for stainless sheet is a die opening of approximately 6t to 8t, subject to grade, thickness, radius, machine capacity, and tooling design. Stainless steel generally requires more force than mild steel. | Use a smooth, polished punch and die with no chips or galling. Choose a die opening that produces the required radius without forcing the sheet into an excessively tight bend. Keep tooling free of carbon-steel contamination. | Correct tooling reduces concentrated contact stress, scoring, galling, and excessive surface damage that can become crack initiation sites. |
| 6 | Control Bend Angle, Force, and Springback | Austenitic stainless steel commonly shows more springback than low-carbon steel because of its higher strength and work hardening. The required overbend depends on grade, temper, thickness, die width, and bend radius. | Start with a controlled test bend, measure the released angle and inside radius, then adjust the CNC program or tooling. Use bottoming or coining only when the equipment and material limits have been verified. | Controlled forming avoids sudden overloading and compensates for elastic recovery without repeatedly reworking the part, which can increase local work hardening. |
| 7 | Inspect the Bend and Validate the Process | Inspect the outside bend surface for longitudinal splits, edge cracks, deep tool marks, and excessive roughness. Confirm the final angle, inside radius, flange length, and surface condition. | Make a representative trial part using the same grade, thickness, temper, grain orientation, tooling, and lubrication used in production. Stop and revise the process if cracks appear; do not rely on polishing to remove structural defects. | Small defects can grow during service or subsequent forming. Process validation confirms that the selected radius and tooling are suitable for the actual material, not just a nominal specification. |
| Note: The values above are practical starting guidelines, not universal design limits. Minimum bend radius, required force, springback, and allowable strain depend on the exact stainless grade, thickness, temper, surface finish, rolling direction, tooling, bend method, and acceptance standard. Always verify critical parts with a controlled forming trial and the applicable material specification. | ||||
Start with an inside radius near the sheet thickness. Test one strip first. Thicker or hardened material may need more room.
Use a clean, correctly sized punch and die. The die should support the sheet without forcing severe deformation. Worn tools may apply uneven pressure.
Yes. Bending across the rolling direction commonly reduces cracking. Mark the grain before forming. Still, test the actual material batch.
Apply force gradually with a steady stroke. Avoid sudden impacts. Stop when whitening, splitting, or fine lines appear.
It can overload the edge and create damage. Confirm the tooling clearance before increasing force. I once used excessive pressure and damaged a narrow strip.
Clean the surface first. Use bright, angled light and a magnifier. Look for short gray lines, uneven marks, and damage at both ends.
Use light, moving passes with clean abrasives. Cool the workpiece between passes. Stop if it turns blue or feels unusually hot.
Reject deep lines that remain after light blending. Do not force a questionable part into service. Critical parts may need dye penetrant testing.
Record the material thickness, grade, grain direction, die width, radius, tool condition, and final angle. Records help, but they may not explain every failure.
How to bend stainless steel without cracking depends on careful preparation, suitable tooling, and controlled forming. Start by identifying the stainless steel grade, thickness, and temper, since each combination has different levels of strength, flexibility, and work-hardening behavior. Select a bend radius that matches the material and use properly sized tooling to reduce excessive stress. Before forming, clean the surface, mark the bend line accurately, and support the sheet or tube securely to prevent slipping or distortion.
During bending, apply force gradually and maintain a steady speed rather than using sudden pressure. Consider the material’s grain direction and bend in the safer direction when possible. After forming, inspect both the outside and inside of the bend for hairline cracks, wrinkles, or uneven deformation. If finishing is required, use controlled methods that do not overheat or remove too much material. These steps help produce cleaner bends, reduce cracking, and improve the reliability and appearance of the finished stainless steel component.
