Elite Steel
How to maintain stainless steel medical instruments is no longer a basic housekeeping question. It is a patient-safety discipline. Stainless steel resists corrosion, but it is not corrosion-proof. Blood residue, saline crystals, detergents, and rough handling can still damage hinges, serrations, and polished surfaces.
The World Health Organization reports that healthcare-associated infections affect about 7 in 100 acute-care patients in high-income countries, and 15 in 100 in low- and middle-income countries. These figures reinforce the importance of reliable instrument processing. CDC guidance also requires thorough cleaning before disinfection or sterilization. AAMI ST79 further emphasizes validated procedures, inspection, packaging, and sterilization monitoring.
Dr. William A. Rutala, a recognized infection-prevention specialist, has repeatedly emphasized, “You cannot sterilize an instrument that has not been cleaned.” That principle remains practical in 2026. Staff should rinse instruments promptly, use approved neutral-pH detergents, and keep joints open during cleaning. A soft brush should reach the hinge without scratching the surface. Instruments must then be dried completely, inspected under bright light, and lubricated with a water-soluble product when appropriate.
Small details matter. A cloudy hinge may signal residue. A brown spot may indicate corrosion, not ordinary dirt. Manual cleaning alone may also be insufficient for complex devices. This article will examine daily care, ultrasonic cleaning, washer-disinfector use, inspection standards, storage, and failure prevention. Some facilities still rely on habit instead of documented evidence. That deserves honest review.
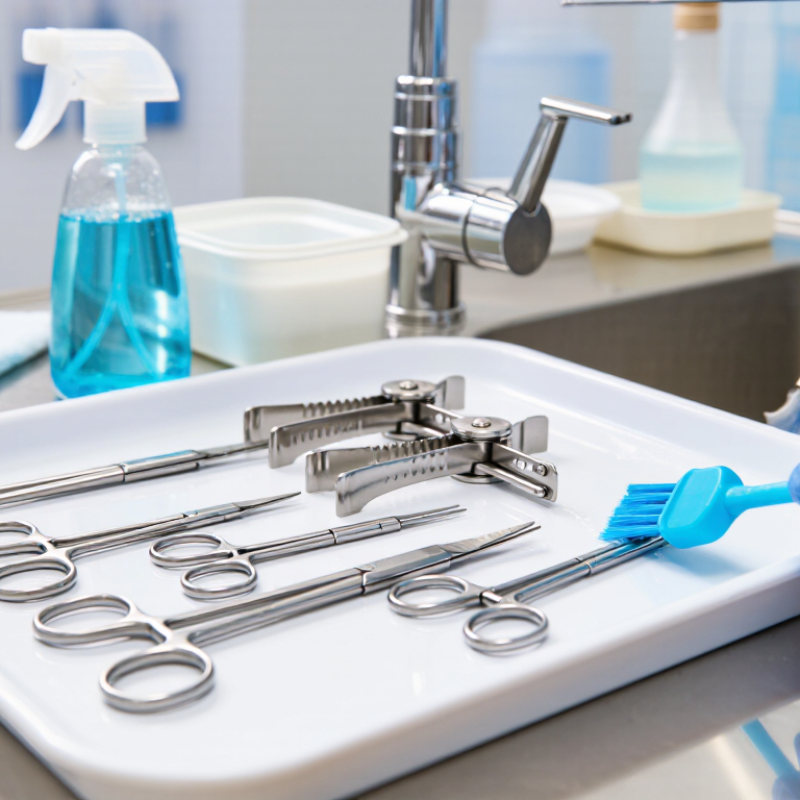
Stainless steel medical instruments are not chemically identical. Austenitic grades, such as 304 and 316, resist corrosion well, while hardened martensitic steel supports cutting edges but needs stricter care. Chloride residue, saline, and trapped moisture can cause pitting, especially around hinges and serrations. The damage may begin as a tiny brown spot. It can later weaken the surface and retain contamination.
The WHO Global Report on Infection Prevention and Control (2022) estimates that about 7% of patients in high-income countries acquire healthcare-associated infections during care. Improperly reprocessed instruments can contribute to this risk. AAMI ST79 emphasizes thorough cleaning before sterilization, because steam cannot reliably sterilize soil beneath dried protein. Use a validated, neutral-pH detergent, soft brushes, and treated water where required. Rinse completely. Dry every joint.
Inspect instruments under bright light, preferably with magnification. Check for stains, roughness, loose joints, misalignment, and reduced cutting performance. ISO 17664-1:2021 supports documented, manufacturer-validated processing instructions for reusable devices. Do not stack wet instruments or leave them in saline. That shortcut is common. It is also costly.
In practice, maintenance schedules sometimes look perfect on paper but fail during busy shifts. Staff may rush drying or overlook a hinge. Those weak points deserve review. Record corrosion patterns, repair frequency, and sterilization failures. Data often reveals a process problem before an instrument visibly breaks.
Safe cleaning begins before instruments reach the decontamination area. Wear appropriate gloves, eye protection, and protective clothing. Handle sharp instruments carefully, and keep them pointed away from the body. At the point of use, remove visible soil with a soft, damp, lint-free cloth. Do not allow blood or tissue to dry. Dried residue can hide inside joints and make cleaning less effective.
Separate delicate instruments from heavier ones during transport. Keep hinged devices open, and place small parts in a secure container. Follow the instrument manufacturer’s instructions for disassembly, compatible detergents, water quality, and temperature limits. Stainless steel resists corrosion, but it is not corrosion-proof. Chloride-rich solutions, harsh chemicals, and prolonged soaking may damage the surface. Never force a joint that feels stiff. Inspect it instead.
Cleaning should occur in a controlled area with suitable ventilation and clear separation from clean supplies. Use brushes that fit the device without scratching its surface. Flush narrow channels thoroughly, then rinse away detergent completely. Hidden foam is easy to miss. After cleaning, inspect hinges, serrations, insulation, and sharp edges under good lighting. No preparation routine is flawless; missed soil still happens. When an instrument looks dull, cracked, or unusually difficult to operate, remove it from service and request qualified assessment. Documenting these findings helps improve training and prevents repeated mistakes.
Cleaning stainless steel instruments begins at the point of use. Remove visible blood before it dries. Keep instruments moist.
The WHO Decontamination and Reprocessing Manual reports that effective cleaning can reduce microbial contamination by approximately 80–90%. This step also protects stainless steel from hardened organic residue.
Wear appropriate gloves, eye protection, and protective clothing. Separate hinged instruments and open every joint. Rinse with cool or lukewarm water, not hot water. Heat can fix proteins onto the surface. Use a neutral, instrument-compatible detergent according to its instructions. Do not guess.
Scrub gently with a soft nylon brush. Flush lumens repeatedly, while keeping openings submerged to limit splashing.
Avoid steel wool, abrasive pads, and chloride-based products. They can scratch or corrode the passive surface.
The CDC Guideline for Disinfection and Sterilization emphasizes that cleaning must occur before disinfection or sterilization.
Rinse thoroughly with treated water when required by facility procedures. Dry every surface immediately, including hinges, serrations, and channels. Inspect under bright light and magnification. Look for stains, cracks, pitting, and retained soil.
A rushed inspection is a common weakness. If corrosion appears, remove the instrument from service and request technical evaluation.
Follow the validated device instructions and AAMI ST79 practices for subsequent packaging and sterilization. WHO Decontamination and Reprocessing of Medical Devices, 2016; CDC Guideline for Disinfection and Sterilization, 2008; AAMI ST79.
Stainless steel medical instruments need disciplined care after every procedure. Begin with inspection under bright, neutral light. Check joints, serrations, tips, insulation, and locking mechanisms for residue or damage. A fine clamp may hide tissue in its hinge. Open hinged instruments fully before cleaning and processing. Follow the instrument and facility instructions for approved cleaning agents, water quality, and processing temperatures. Never rely on appearance alone. Clean metal can still contain dried protein.
Drying deserves equal attention. Moisture trapped inside a box lock can encourage staining and interfere with later processing. Use lint-free materials and filtered air where permitted by local procedures. Keep instruments separated so water cannot remain between surfaces. Apply a compatible, water-soluble instrument lubricant to moving joints when required. Use only a small amount. Excess lubricant can attract debris and reduce effective processing. I once overlooked a damp hinge during a busy shift; the instrument later showed discoloration. That mistake reinforced the value of a slower final check.
Before packaging, confirm that instruments are clean, functional, and completely dry. Place delicate tips in protective holders, and avoid overloading trays. Packaging should support sterilant contact while preventing movement and punctures. Inspect wraps, pouches, and seals for tears, weak edges, or trapped moisture. Record damaged instruments and remove them from service according to facility policy. A second inspection is worthwhile. Small failures often appear after the first inspection.
Pre-sterilization maintenance targets for inspecting, drying, lubricating, and packaging reusable stainless steel medical instruments.
The chart presents operational targets rather than brand-specific performance data. Instruments should be inspected for soil, damage, corrosion, and proper function; dried completely; lubricated with a water-soluble instrument lubricant when applicable; and packaged only when clean, dry, and intact. Always follow the instrument manufacturer’s validated reprocessing instructions and applicable healthcare standards.
How to Maintain Stainless Steel Medical Instruments in 2026?
Stainless steel instruments need cleaning before sterilization. Soil can shield microorganisms from heat. The CDC classifies instruments entering sterile tissue as critical items, requiring sterilization. Use a validated steam cycle suited to the instrument, load, and facility equipment. Follow current manufacturer instructions and local infection-control procedures. Do not guess cycle times. That shortcut can fail quietly.
After use, keep instruments moist during transport. Open hinged tools before cleaning. Use neutral or instrument-compatible detergents, then rinse thoroughly with treated water. Inspect every surface under bright light. Look for pitting, discoloration, cracked insulation, stiff joints, and hidden residue. A 2022 WHO global report estimated healthcare-associated infections affect 7 in 100 acute-care patients in high-income countries. Small maintenance errors deserve serious attention.
Dry instruments completely before packaging. Arrange them without crowding. Protect sharp tips and avoid contact between dissimilar metals. Store sterile packs in clean, dry cabinets, away from sinks, dust, and heavy traffic. AAMI ST79 supports event-related sterility, meaning package integrity matters more than an arbitrary date. Rotate stock carefully, but reject wet, torn, crushed, or opened packaging. Lubricate joints only with products approved for sterilization. Monitor chemical and biological indicators according to facility policy, and document failures honestly. Instruments may still look clean while corrosion has begun. The difficult lesson is simple: visual inspection alone is not enough.
Austenitic steel resists corrosion well, while hardened steel supports sharper cutting edges. Each material has different care limits. Stainless is not corrosion-proof.
Chloride residue, saline, and trapped moisture can create tiny pits. Check hinges and serrations carefully. A small brown spot may signal deeper damage.
Remove visible soil with a soft, damp, lint-free cloth. Keep blood and tissue from drying. Use compatible detergent, soft brushes, complete rinsing, and treated water when required.
Open joints expose hidden surfaces and reduce trapped residue. Dry every hinge completely. A rushed hinge inspection is an easy mistake.
Use bright light and magnification when available. Check for stains, roughness, loose joints, misalignment, and reduced cutting performance. Hidden residue can remain despite a clean appearance.
Do not force the joint. Remove dull, cracked, pitted, or difficult instruments from service. Request qualified assessment and record the finding.
Clean and dry them completely before packaging. Avoid crowding and protect sharp tips. Store sealed packs in clean, dry cabinets away from sinks and heavy traffic.
No. Instruments may look clean while corrosion or residue has started. Review sterilization records, repair frequency, and repeated corrosion patterns. The process may be the real problem.
How to maintain stainless steel medical instruments begins with understanding the material, its resistance to corrosion, and the risks caused by blood, tissue residue, harsh chemicals, moisture, and improper handling. Before cleaning, instruments should be sorted, opened, and kept moist when appropriate to prevent contaminants from drying. Safe decontamination requires suitable protective equipment, clean water, compatible detergents, and careful attention to the instrument’s design and manufacturer-approved instructions.
The cleaning process should remove all visible soil through manual or validated mechanical methods without scratching the surface. After cleaning, each instrument should be rinsed, thoroughly dried, inspected for damage, tested for proper function, and lubricated with a compatible medical-grade product when necessary. Instruments should then be packaged correctly for sterilization, processed using an approved method, and stored in a clean, dry environment that protects package integrity. In 2026, consistent documentation, routine quality checks, staff training, and timely replacement of damaged instruments remain essential for reliable infection prevention and long-term performance.
